DISCLAIMER
I am not in any way affiliated to Starlight Xpress, I am only a customer who had an issue and this is the solution I was proposed by SX. I describe it here as it might be useful to you in the future. it might not cover all the situations, but this is what I found out. I won’t be responsible for any damage occurs to your equipment, so use this information at your own risk.
I got back two days ago my AO unit from SX as I had the unwise idea to use the erase button on the SX AO Utility, with the result of wiping the factory configuration. When I got the item back I immediately mount it on my setup, the sky was clear and I was so much looking forward to image with all the set up working fine. It was just an illusion: after hearing the typical noise of the AO initializing, the noise lowered, followed by a flat sound that didn’t resemble anything good.
After an exchange of emails with SX personnel (I won’t mention his name for privacy, but you probably know whom I am talking about), we sort the issue out and here I explain how.
SYMPTOMS:
1) With the recovery button in the SXAO Utility you don’t manage to initialize the AO and the procedure times out. The version button and handshake button work fine (otherwise you probably have other issues, like serial connectivity issues).
2) Your imaging software doesn’t succeed to connect the AO
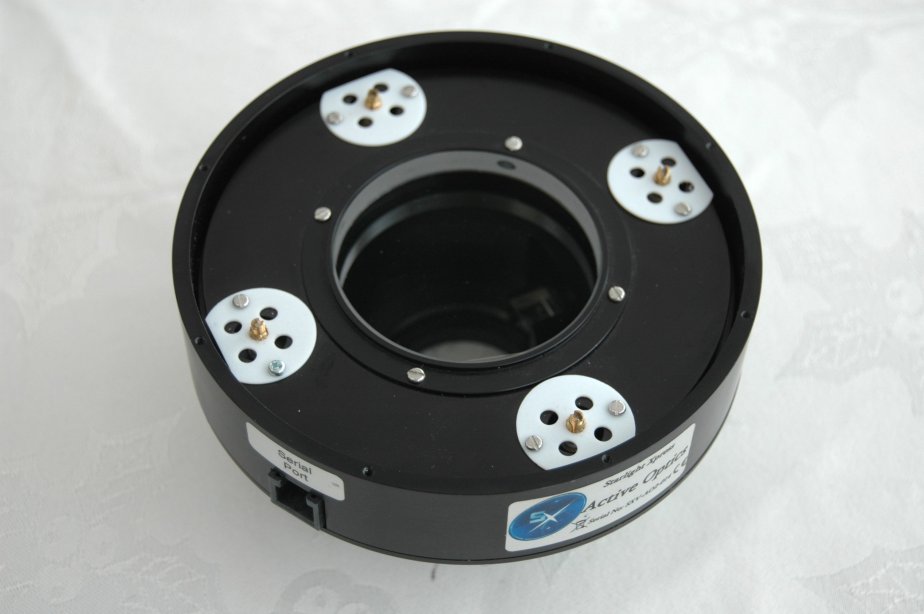
You need to consider the way the AO works. There is a tilting plate with the optical window mounted on, and the plate is made to tilt by four driving screws. It’s driving screws’ clockwise and counterclockwise turn that make the plate to tilt.
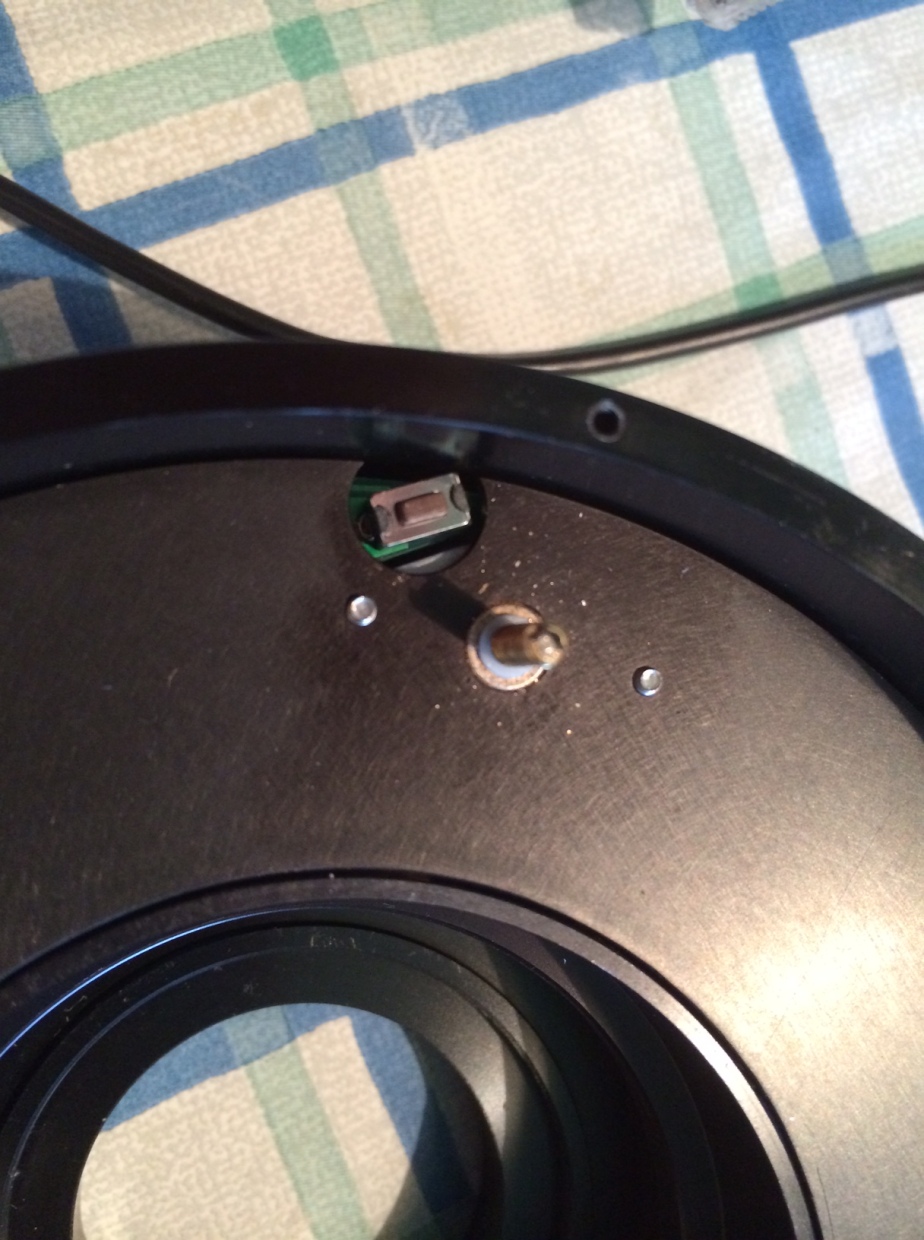
Another thing to consider is the lower end run of the plate. At the bottom of the AO case, in the same location as the driving screws, there are four switches. Those switches, when pressed by the tilting plate, inform the firmware that the plate has reached the bottom and it needs to turn the corresponding driving screw in the opposite direction.
So what does it happen when the tilting plate jams? With the help of SX, I found that the main root cause in this cases is that one or more switches, for any reason, weren’t hit by the tilting plate during the initialization phase, with the result of having one or more sides of the tilting plate to over run the driving screw to the point that it could also be not engaged into the thread anymore. Another reason of the tilting plate not hitting the switches could be that the threaded hole for the driving screws being too tight so the driving screw does not run properly. In my case to solve the issue i simply unmount the tilting plate and rotating it so the driving screws where screwed in a
different thread. I was also suggested that sometimes this is not enough and therefore you need to slightly enlarge the thread yourself using a small screwdriver. It wasn’t my case.
How to recover it? Here are the steps I used to solve the issue:
0 – If the AO is powered, power it off.
1- Open the front cover of the SXAO. The front cover is the one facing the scope. There are 8 tiny screws that may be unscrew by a cross screwdriver.
2- Once you open the front cover, you see four white plastic “semi-circles”. At the centre of each “semi-circle” there is the thread of each driving screw. You’ll likely have one or more of the following situations:
a – the driving screw underneath the plate is not engaged in the thread.
b – the thread is too tight on one of the sides so the screw can’t move the plate on that side properly
c – threads or screws could have some dust, disturbing the driving screw run.
3- Using a small flat screwdriver, small enough to pass through the threads, turn the screw clockwise in order to disengage all the four sides. The extract the plate.
4- you’ll see at the bottom the four black switches. Push gently each of them and feel the “click” of it. If they work fine then there are usually no problems with the switches, if you don’t feel the click on at least one of them, you better contact SX.
5- With a lens brush, clean the housing of the plate and clean the screws. I noticed some metal dust around the screws, probably because they are new (I purchased the AO only few months ago and we had a lot of bad weather here). I think it is better to remove it in order to not have the dust running on the thread and compromising the the driving screw run.
6- Put back the AO tilting plate and screw the four sides back turning them counterclockwise. Screw them all four until you reach to see the driving screw standing out of the thread by 3 “turns”
7- At this point you may power on the AO and run again the SX AO Utility. Push the “recovery” button and at this point, if everything is fine, you have to see the tilting plate going down to the bottom, hitting the four switches (you can hear the clicks), coming back to the maximum run allowed and tilting on each side with the related switch click. If this is not the case try again a couple of times with the tilting plate rotated different as explained above and perhaps with the driving screw screwed in such way that the tilt plate is in a lower position with respect you tried before (but not completely down otherwise the switches are already pushed, you notice that when you reach that point).If you don’t succeed after some trial, you better contact SX.
I hope you find this useful, I enclose a couple of pictures and this is a link to a video of what the plate should NOT do when working properly.


